

“The Statue Gallery” was a D&D Side Trek adventure appearing in Dungeon Magazine Issue #93 (July/August 2002). The adventure is suitable for a party of four 9th-level characters. It takes place in a series of underground caverns that can be easily inserted into any ongoing campaign.
The original adventure was written by Johnathan M. Richard with artwork by Anthony Waters and Cartography by Christopher West. This Fifth Edition conversion is by DMDave. The adventure has been converted for education purposes and is not available for reselling or purchase.
The Statue Gallery
by Johnathan M. Richard
Artwork by Anthony Waters – Cartography by Christopher West – 5E conversion by DMDave
Adventure Background
The medusa Korakaia dwells in a set of connected caverns. These caverns hold a collection of her victims, each frozen in stone as a result of her petrifying gaze attack. Korakaia’s “statue gallery” serves as camouflage for her monstrous assistants: a mimic, a phasm, and a pair of vargouilles. The vargouilles and mimic pretend to be statues (or parts thereof), while the phasm currently wears the guise of a small stone. Korakaia wears a hat of disguise and a magic amulet that allows her to take on the shape of a statue herself.
Adventure Synopsis
While traveling through the Underdark or during any underground cavern-crawl, the PCs pass the entrance to Korakaia’s cave complex. Upon entering, they deal with the medusa and her minions and possibly free some of her petrified statues.

Beginning the Adventure
Korakaia’s lair can be placed in almost any underground location. Feel free to insert the entrance tunnel (area 1) wherever you think these encounters would have the most impact.
1 – Entrance Tunnel (Medium)
As the characters pass through this entrance tunnel, a DC 20 passive Perception check reveals a petrified rat among the jumble of fallen stones. Furthermore, a DC 21 passive Perception check reveals something odd about one of the rock piles; it’s a phasm (the phasm stat block is available on my Patreon, but if you can’t or don’t wish to become a patron, simply use a mimic with 200 hit points that can make three pseudopod attacks on each of its turns; its CR is 9). After detecting the characters enter via its tremorsense, the phasm telepathically warns Korakaia and the others of their approach.
If the characters detect the phasm, it remains unthreatening unless attacked. If questioned by the characters, the phasm tells them that a medusa once laired in the cavern ahead but was slain years ago. This, of course, is a blatant lie; make a Deception check for the phasm contested by the characters’ passive Insight scores. If the characters are suspicious, the phasm informs them that they can see for themselves, as her skeleton lies in the cavern to the north.
2 – The Statue Gallery (Hard)
The tunnel widens into an enormous cavern. You can see several statues scattered here and there along the sides of the cavern wall, and a toppled one in the middle. Further back, a ledge splits the cavern into two different heights, with a slope on the right side leading up to the upper level.
Describe each statue to the players as the characters approach them (see “The Petrified Statues” at the end of the adventure). Korakaia and her minions do not move, appearing to be statues themselves. When the characters reach the toppled “umber hulk statue,” read or paraphrase the following:
The scene before you is irony at its very best: Apparently, an unbalanced stone statue of an umber hulk toppled forward, crushing the individual standing immediately before it. Judging from the numerous snake skeletons clustered around the victim’s skull, it would seem that a twist of fate took care of a medusa as she petrified her final victim. A bow juts out from underneath the statue; from what you can see of it, it looks intact.
Korakaia faked a medusa skeleton using the bones of a human victim and the skeletons of numerous snakes, carefully arranged to appear as the slain medusa’s “hair.” The bow under the fallen statue is treasure, while the statue itself is a mimic. If the characters attempt to interrogate the “medusa” skeleton via a speak with dead spell, it can tell the characters that it was struck from behind and did not see its attacker; Korakaia and her allies will take this as an indicator that “the jig is up” and attack the characters at this point.
Creatures
The umber hulk statue is actually a mimic. It waits for the characters to attempt to lift it off the shortbow before attacking them, as then their hands will be empty of weapons. The other denizens wait for the characters to approach the umber hulk statue and make the attempt to lift the statue before attacking as well.
Korakaia the medusa is currently under the effects of her magic amulet, and as such appears to be a petrified statue. However, she is fully aware of her surroundings and can see and hear the characters as they enter her cavern. (See the “Amulet of Statues” at the end of the adventure). If the characters attack her in statue form, she returns to flesh and engages them in combat.
Tactics
As soon as the characters attempt to hoist the statue off of the skeleton to retrieve the bow, the mimic excretes adhesive from its pores, holding fast anyone currently in contact with its body and lashing out with a sticky pseudopod at one of the characters.
At this point, two vargouilles (see VGtM for their stat block) fly off their perches (on statues Q and R) and use their shriek attacks on the characters, following with a kiss on anyone paralyzed by the shrieks.
Korakaia deactivates her amulet and fires arrows at the characters from higher ground, using the petrified human fighter with the tower shield as cover if necessary (the statue grants her full cover unless a character can flank her). She is armed with a +1 longbow and carries a potion of greater healing which she uses as soon as she takes 20 damage or more. Korakaia only deactivates her hat of disguise and uses her gaze attack if absolutely necessary, as she prefers to loot her victims’ bodies of valuables, which is impossible once they turn to stone. The vargouilles seek to create others of their kind with their unholy kiss. If any characters transform into vargouilles as a result, the remains of their cast-off bodies feed the monsters dwelling here. The vargouilles concentrate their attacks on any character adhered to the mimic, while Korakaia strikes those that are free, keeping plenty of distance between herself and the characters. The phasm holds itself in reserve, only entering the fray if the characters gain the upper hand.
If the phasm enters battle it changes form each round, using the most powerful attack of its adopted body before switching to a new form. It prefers ranged attacks over melee.
It’s favorite attack forms are as follows:
- Young blue dragon. The phasm uses the dragon’s lightning breath and flies.
- Frost giant. The phasm throws a rock.
- Hydra. The phasm uses the hydra’s multiple heads to make five attacks and maintains crowd control with its multiple reactions.
- Bulette. The phasm uses the bulette’s deadly leap.
If the battle goes against her (if several of her monstrous companions are slain and the characters resist her efforts at petrifying them with her gaze attack), Korakai feels to the pool at area 5, drinks the potion of water breathing kept there and attempts to escape downstream.
Treasure
A detect magic spell indicates that the bow under the “umber hulk” is magical. It is a chaotic shortbow, which is a rare magic item that acts as a +1 shortbow that deals an additional 3d6 piercing damage against creatures of lawful alignment; for this reason, it can not be wielded by characters of lawful alignment. It does not require attunement. The bow cannot be pulled from underneath the statue; the statue/mimic must first be lifted, requiring a successful DC 19 Strength check. Once the bow is removed from underneath the statue, a character with proficiency in bows recognizes that the bowstring is weakened. A character can fix it by spending one hour and making a successful DC 15 Dexterity check using shortbow proficiency.
Korakaia wears a hat of disguise and wields a +1 longbow. In addition to these items, she has a potion of greater healing (which she probably drank during the combat) and an amulet of statues. The amulet of statues is a 3-inch stone amulet carved in the shape of a humanoid (or sometimes just a head). The wearer can use its bonus action to say a command word in order to change themselves into a statue. While in statue form, the character has the petrified condition, except it is aware of its surroundings. At any time, the creature can use another bonus action to mentally change itself back to normal. The amulet’s property can’t be used again until the next dawn. It is an uncommon magic item and does not require attunement.
3 – Fungal Garden
The mushrooms and other assorted fungi grown here are harmless. Korakaia uses them a supplementary food source, and on a whim, added a gnome statue made from an appropriate victim.
4 – Korakaia’s Lair
The cavern narrows and leads down along a series of natural steps.
This is where Korakaia eats, sleeps, and stores part of her loot. There are several old winter blankets piled on the floor, with which Korakaia makes her bed. Stuffed in an old canvas backpack (taken from a slain but not petrified adventurer) is some of her treasure.
Treasure
The contents of a dungeoneer’s backpack are found in her lair.
5 – Pool
To the south lies a large pool of water. An underground spring runs from northeast to southwest. Near the center of the pool lies a smooth, round rock that juts up just above the water’s surface.
The smooth rock is actually the petrified remains of a chuul that entered the pool via the stream. Korakaia has hollowed out a small area under the chuul’s body, between its submerged legs. In this gap, she keeps the rest of her treasure.
Treasure
A small bag with another 210gp and 120 gp, a potion of water breathing, and a wand of cure wounds. The wand is an uncommon item and holds 7 charges; it regains 1d6 + 1 charges each day at dawn. If you expend the wand’s last charge, roll a d20. On a roll of 1, the wand crumbles into ashes and is destroyed. While wielding it a character can use an action to expend 1 charge to cast the 1st-level version of cure wounds. When discovered, the wand has 5 charges remaining, but Korakaia lacks the ability to activate it herself.
If the characters enter and examine the contents of the pool, they’ll find the two petrified heads of Statues Q and R, the slain adventurers that the vargouilles currently use as their roosts, as well as a few humanoid bones, the remains of former meals. Most of the rest of the detritus that Korakaia tosses in here has been swept by the current.
Conclusion
The stream winds and meanders for several miles before spilling into an underground lake. You can connect this stream to other existing Underdark locations in your campaign as desired.
If Korakaia escapes, she would make an excellent recurring villain. She’s a despicable creature who revels in torture and the pain of others as evidenced by her treatment of her petrified victims. She’s certain to hold a grudge against those who ruined her “perfect hideaway.”
The Petrified Statues
A. Male dwarf fighter in scale mail, battleax raised overhead.
B. Umber hulk with arms upraised. The statue has toppled over onto a now-skeletal medusa. A shortbow protrudes from underneath the statue.
C. Male Gnome wearing a pointy hat.
D. Snarling lizardfolk, unarmed, frozen in an attack stance.
E. Panicked male gnome fighter, sitting on the ground with his right arm raised before him in horror.
F. Frightened kobold, eyes wide in disbelief.
G. Fleeing kobold, both arms raised high in terror.
H. Fleeing kobold, arms forward as if to push others out of his way.
I. Kobold on his knees, clasping his hands before him in a pose of pleading supplication.
J. Male human warrior peering out from behind a tower shield.
K. Female elf archer with a drawn bow, poised to let fly an arrow. This is really Korakai using her hate of disguise to appear as an elf, and her amulet of statues to appear petrified.
L. Male elf archer with a drawn bow, poised to let fly an arrow.
M. Female elf spellcaster, right hand thrust forward as if casting a spell.
N. Snarling male half-orc fighter wielding a scimitar and carrying a shield.
O. Surprised female halfling rogue shielding her face with her hands.
P. Male human fighter in plate mail with visored helm down and an arm blocking his face.
Q. Male human fighter wearing a winged helmet, raising his hands protectively over his face. (The winged helmet is really a vargouille that perches here when not attacking. The stone victim’s head was removed to make room for the vargouille.)
R. Female human fighter wearing a winged helmet, hiding her face behind her hands. (Likewise, this is a headless statue, upon which is perched a vargouille. The raised hands of the statue help hide the creature’s true nature.)
If the characters use greater restoration or similar spells to restore any of these statues to their normal, living form, they’ll learn the depths of Korakaia’s depravity. After petrifying them with her gaze, she had the phasm (in troll form) rip the heads off the stone statues and carefully place them back in position. Thus, reverting a statue to flesh merely results in a flesh corpse, whose bloody head topples forward off its neck stump. A successful DC 20 Intelligence (Investigation) check reveals the narrow crack along the statue’s neckline; once one such crack has been found all other similar Investigation checks are done with advantage.
Scaling the Adventure
“The Statue Gallery” is designed for four 9th-level characters, but it can be modified for parties of different sizes or levels. Consider adapting the adventure as follows:
5th- to 6th-level characters: Remove Korakaia and the phasm from the lair. When the characters explore the cavern, Korakaia’s out hunting for prey, leaving the defense of her lair to the mimic and vargouilles. Once the characters have faced the mimic and vargouilles, Korakaia can return for a final confrontation.
7th- to 8th-level characters: Remove the phasm from the lair.
10th- to 11th-level characters: Give each vargouille the Nimble Escape feature (same as a goblin’s), a +6 bonus to Stealth and adjust their CR to 3. Make Korakaia’s weapon a +2 longbow, give her 145 hit points and her multiattack a third attack with her longbow; her CR is 7. Finally, give the mimic 90 hit points; its CR is 3.
12th – to 13th-level characters: In addition to the aforementioned changes, increase the vargouille’s hit points to 30 and give them Multiattack, allowing them to make two bite attacks. Their CR is now 4. Increase Korakaia’s hit points to 175 and adjust her CR to 8; alternatively, you can leave Korakaia the same as described in the adventure, but add a second medusa, Korakaia’s sister Kolykaia.
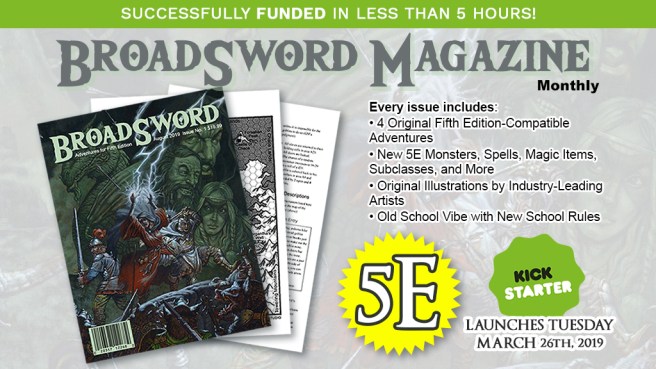
BroadSword Magazine is now on Kickstarter!
It’s hard to believe that we were funded in less than five hours. Thanks so much to everyone’s that’s chipped in with their support.
If you haven’t already heard, go ahead and check it out now. This monthly magazine looks to capture the feel of the old Dungeon/Dragon magazines from the ’80s and ’80s. Old School Feel with New School (5e) rules.